Dark/Light mode
This guide describes how to set up a dark mode for your store and give visitors a switch to toggle it.
Dark mode in Mind works by mapping color schemes: each light scheme is paired with a dark scheme, and when a visitor turns dark mode on, every section that uses a light scheme switches to its dark partner. You therefore need at least one color scheme with a dark background and light text.
Check the dark color schemes
- On your store's Shopify admin page, from the left-side menu, select Sales channels > Online store > Themes.
- In the Current theme section, select Customize to open the Theme editor.
- Select the Theme settings tab in the sidebar and open Colors.
- Check that you have at least one dark scheme (dark Background, light Text), or select Add scheme to create one. Note its name. Every Mind preset ships with Scheme 1 (light), Scheme 2 (dark) and Scheme 3 (light).

Map light schemes to dark schemes
- Still in Theme settings, open Dark mode.
- In the Dark mode mapping field, enter one pair per line in the format Light scheme: Dark scheme. Press Enter to add another line.

All three presets ship with this mapping:
Scheme 1: Scheme 2
Scheme 3: Scheme 2
Read it as: sections that use Scheme 1 or Scheme 3 switch to Scheme 2 in dark mode. Several schemes can point to the same dark scheme, as here. If you add more schemes, add a line for each one, for example:
Scheme 1: Scheme 2
Scheme 3: Scheme 2
Scheme 4: Scheme 5
- Select Save.
Schemes are numbered in the order they appear in Theme settings > Colors: the first is Scheme 1, the second Scheme 2, and so on. A scheme that is not listed in the mapping keeps its colors in dark mode, so sections that already use a dark scheme (as every homepage section does in the Fluxen preset) stay as they are.
Add the Dark mode switch
Visitors toggle dark mode with a switch in the Floating sidebar section. The switch is turned on in every preset.
- In the Theme editor sidebar, scroll to the Features group at the bottom of the section list.
- If Floating sidebar is not there, select Add section and choose Floating sidebar.
- Select the section and turn on Show dark mode.
- Choose the Placement of the sidebar (Top left, Top right, Middle left, Middle right, Bottom left or Bottom right) and whether it is Hidden on scroll down.
- Select Save.
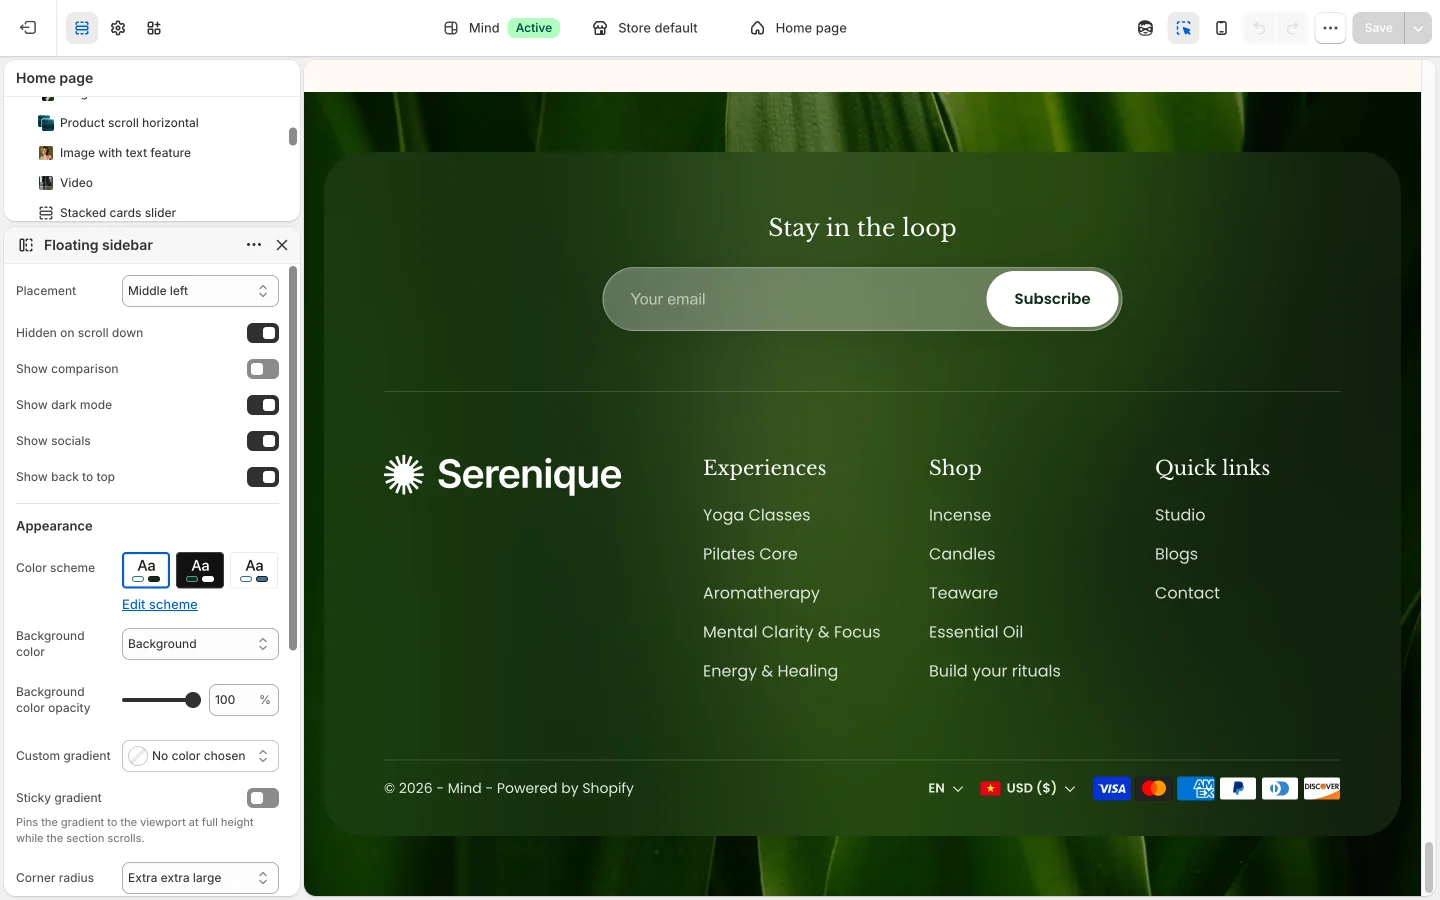
The Floating sidebar is a section group, so the switch appears on every page. The same section can also show comparison, social and back-to-top buttons (Show comparison, Show socials, Show back to top). The visitor's choice is remembered in their browser on later visits.
Set images for dark mode
Some images need a light version for a dark background:
- Header logo: in Theme settings > Logo and favicon, upload an Inverse logo. The header shows it instead of the Default logo in dark mode.
- Footer logo: in the Footer section, upload a Logo darkmode image next to the footer logo.
- Image blocks: the Image block has an Image (darkmode) field. When it is set, that image replaces the main image in dark mode.
Preview your homepage, product page and cart with dark mode on. Images, badges and buttons that look fine on a light background may need a different scheme, and you can pair any section with its own dark partner by giving it its own light scheme and adding a line to the mapping.