Product metafield data
This guide describes how to create product metafields and use them with the Mind features that read them: the Product compare modal, the Countdown timer and Videos blocks, product properties on product cards, and the Image gallery and Gallery showcase sections.
Mind looks for its built-in keys in the theme namespace first and falls back to the custom namespace, which is the namespace Shopify uses when you create a definition in the admin. The Product compare modal reads the custom namespace only.
| Feature | Metafield key | Type |
|---|---|---|
| Product compare modal | custom.<your key> | Single line text or Multi-line text |
| Countdown timer block | custom.product_countdown | Date and time |
| Videos block | custom.product_videos | File, list of files (videos) |
| Product properties on product cards | custom.product_properties | Metaobject, list of entries |
| Image gallery, Gallery showcase | any key you choose | File, list of files (images) |
guide-product-metafield-data-1.webp
Create a product metafield definition
- On your store's Shopify admin page, from the left-side menu, select Settings > Custom data > Products, then select Add definition.
- Fill in the definition:
- Name: what you want to show as the row heading, for example
Session length. Shopify fills in Namespace and key ascustom.session_length; keep that default. - Type: pick the type listed in the table above for the feature you want to use.
- Name: what you want to show as the row heading, for example
- Select Save. Repeat for every metafield you need.
guide-product-metafield-data-2.webp
Assign values to products
- Select Products from the left-side menu, then open a product.
- Scroll to the Metafields box at the bottom of the product page and enter a value for each definition.
- Select Save. Repeat for the other products.
guide-product-metafield-data-3.webp
Show metafields in the Product compare modal
The compare modal opens when a shopper adds products to compare from product cards and then opens the comparison from the header or the floating sidebar.
-
From the left-side menu, select Sales channels > Online store > Themes, then select Customize on the current theme.
-
Make sure compare is switched on: in Theme settings > Product cards, enable Show compare. Then turn on Show comparison in the Header section, in the Floating sidebar section of the Features group, or both.
-
In the sidebar, scroll to the Overlay group and select the Product compare modal section.
-
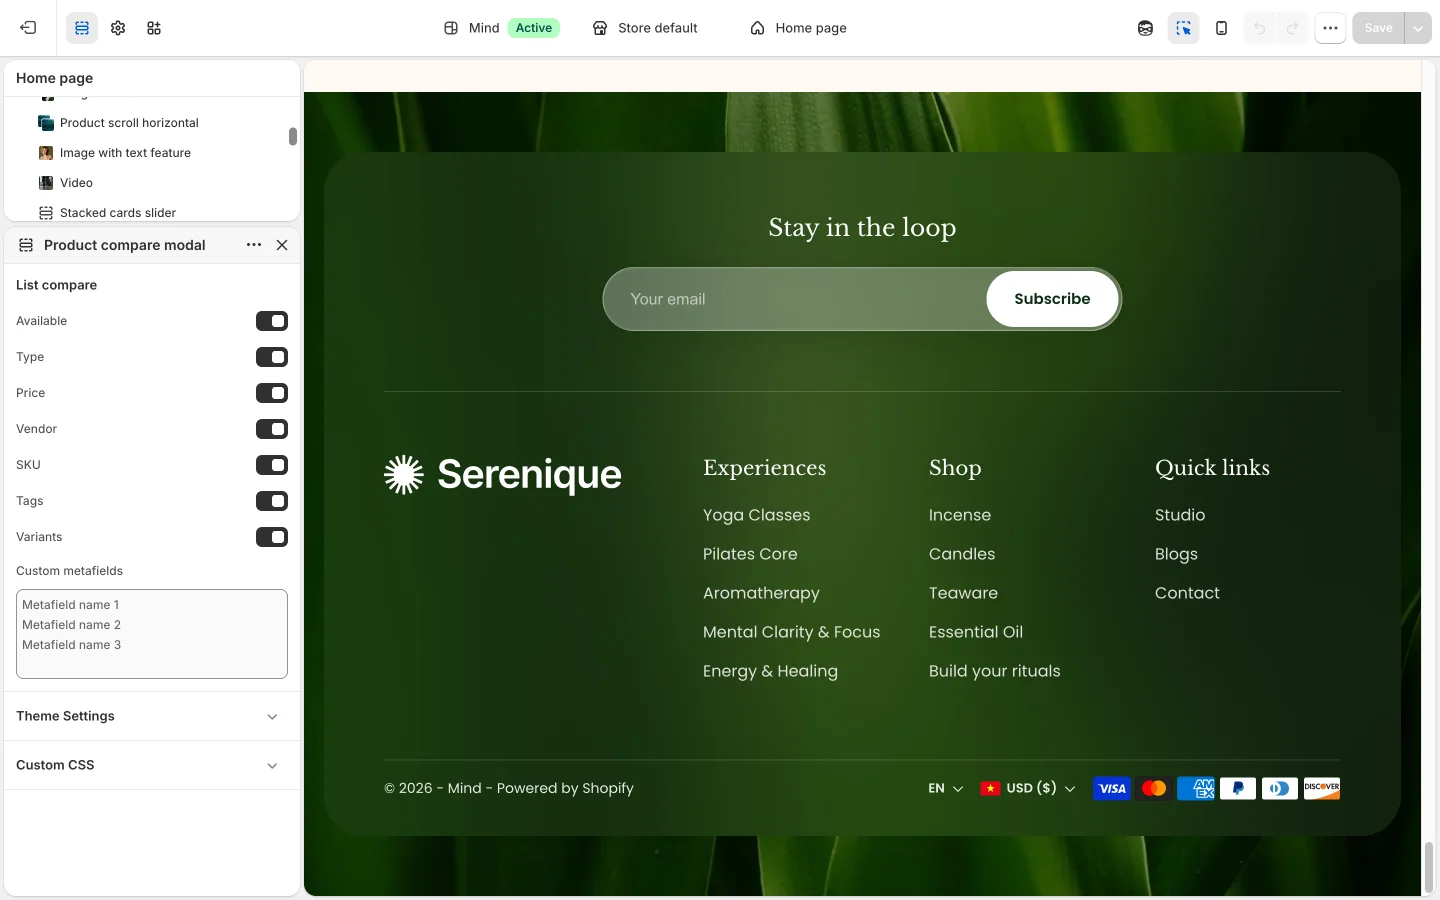
Under List compare, tick the built-in rows you want (Available, Type, Price, Vendor, SKU, Tags, Variants).
-
In Custom metafields, enter the Name of each definition on its own line, exactly as you typed it in the admin:
Session lengthFormatLevelMind converts each line to lower case, replaces spaces with underscores and reads
custom.<key>from every product in the table (soSession lengthreadscustom.session_length). Products without a value show a dash. -
Select Save.
Drive the Countdown timer block from a metafield
The Countdown timer block of the Main product section reads a Date and time metafield with the key product_countdown and counts down to it in days, hours, minutes and seconds. The block stays hidden on products where the metafield is empty.
- Create a definition named Product countdown with Type set to Date and time so the key becomes
custom.product_countdown. - On each product that needs a timer, set the end date and time in the Metafields box and select Save.
- In the Theme editor, select the Main product section on the product template, select Add block > Countdown timer, and fill in the Headline and Label text.
- Select Save.
The Featured product section has the same Countdown timer block.
Show product videos with the Videos block
The Videos block of the Main product section shows a grid of video thumbnails; each one opens the video in a modal.
- Create a definition named Product videos with Type set to File, select List of files and limit it to videos, so the key becomes
custom.product_videos. - On each product, upload or pick the videos in the Metafields box and select Save.
- In the Theme editor, select the Main product section, select Add block > Videos, and set the Heading, Aspect ratio, Columns, Columns mobile and the Play button options.
- Select Save. The block shows nothing on products without videos.
Show product properties on product cards
Product cards in the Main collection and Related products sections can show up to three short properties (for example Duration — 60 min) over the product image.
- Select Settings > Custom data > Metaobjects and add a metaobject definition, for example
Product property, with two Single line text fields whose keys aretitleanddescription. - Select Settings > Custom data > Products and add a product definition named Product properties with Type set to Metaobject, select List of entries and pick the metaobject definition, so the key becomes
custom.product_properties. - On each product, add up to three entries in the Metafields box and select Save. The first three entries are shown.
- In the Theme editor, select the Main collection section on a collection template (or the Related products section on a product template) and enable Show properties on the image.
- Select Save.
Fill image sections from a metafield
The Image gallery and Gallery showcase sections can take their images from a product metafield instead of image blocks when they are placed on a product template.
- Create a product definition with Type set to File, select List of files and limit it to images, for example
Session photos(custom.session_photos). - On each product, add the images in the Metafields box and select Save.
- In the Theme editor, select the Image gallery or Gallery showcase section on the product template, set Image source to Product metafield, and enter the definition's namespace and key in Metafield, for example
custom.session_photos. - Select Save.
Elsewhere, any text setting in the Theme editor that shows the Connect dynamic source icon (for example the content of a Collapse block) can be connected to a product metafield so the value changes per product.
Use the same definition names for all products in a category so that the compare table lines up. Row names come straight from the Custom metafields field, so type each name the way you want it to appear as the row heading.